Git for Scientists
Lars Schöbitz
July 15, 2026
Part 1: Welcome {background-color=“#5c5751”}
Meet the lecturer
Lars Schöbitz
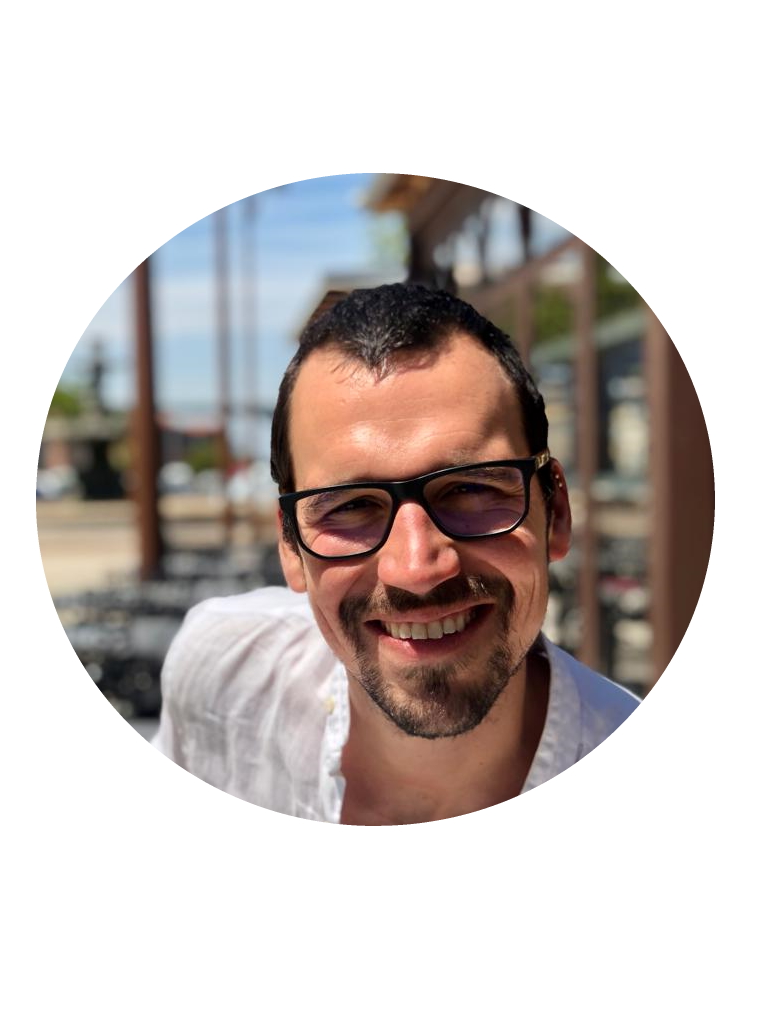
- Environmental Engineer
- Retired researcher
- RStudio certified instructor
- Data steward at ETHZ
Your turn
Think about the last time you published a written document:
- Which tasks gave you joy?
- Which tasks were challenging or frustrating?
Take some written notes.
What this day is, and is not
- Today is the Git and GitHub foundation for collaboration: create, clone, commit, push, branch, pull request, review, merge.
- Today is not an AI workshop. Working with AI coding agents builds on exactly these skills; that is the follow-up workshop.
- It is safe to fail here. Everything we do today is reversible, and breaking things is part of the plan.
- Git and GitHub -> what we learn today
- Quarto and R -> you will see them, not learn them
- RStudio IDE -> our interface, could also be VS Code, Positron IDE, GitHub Desktop, and others
Meeting you where you are
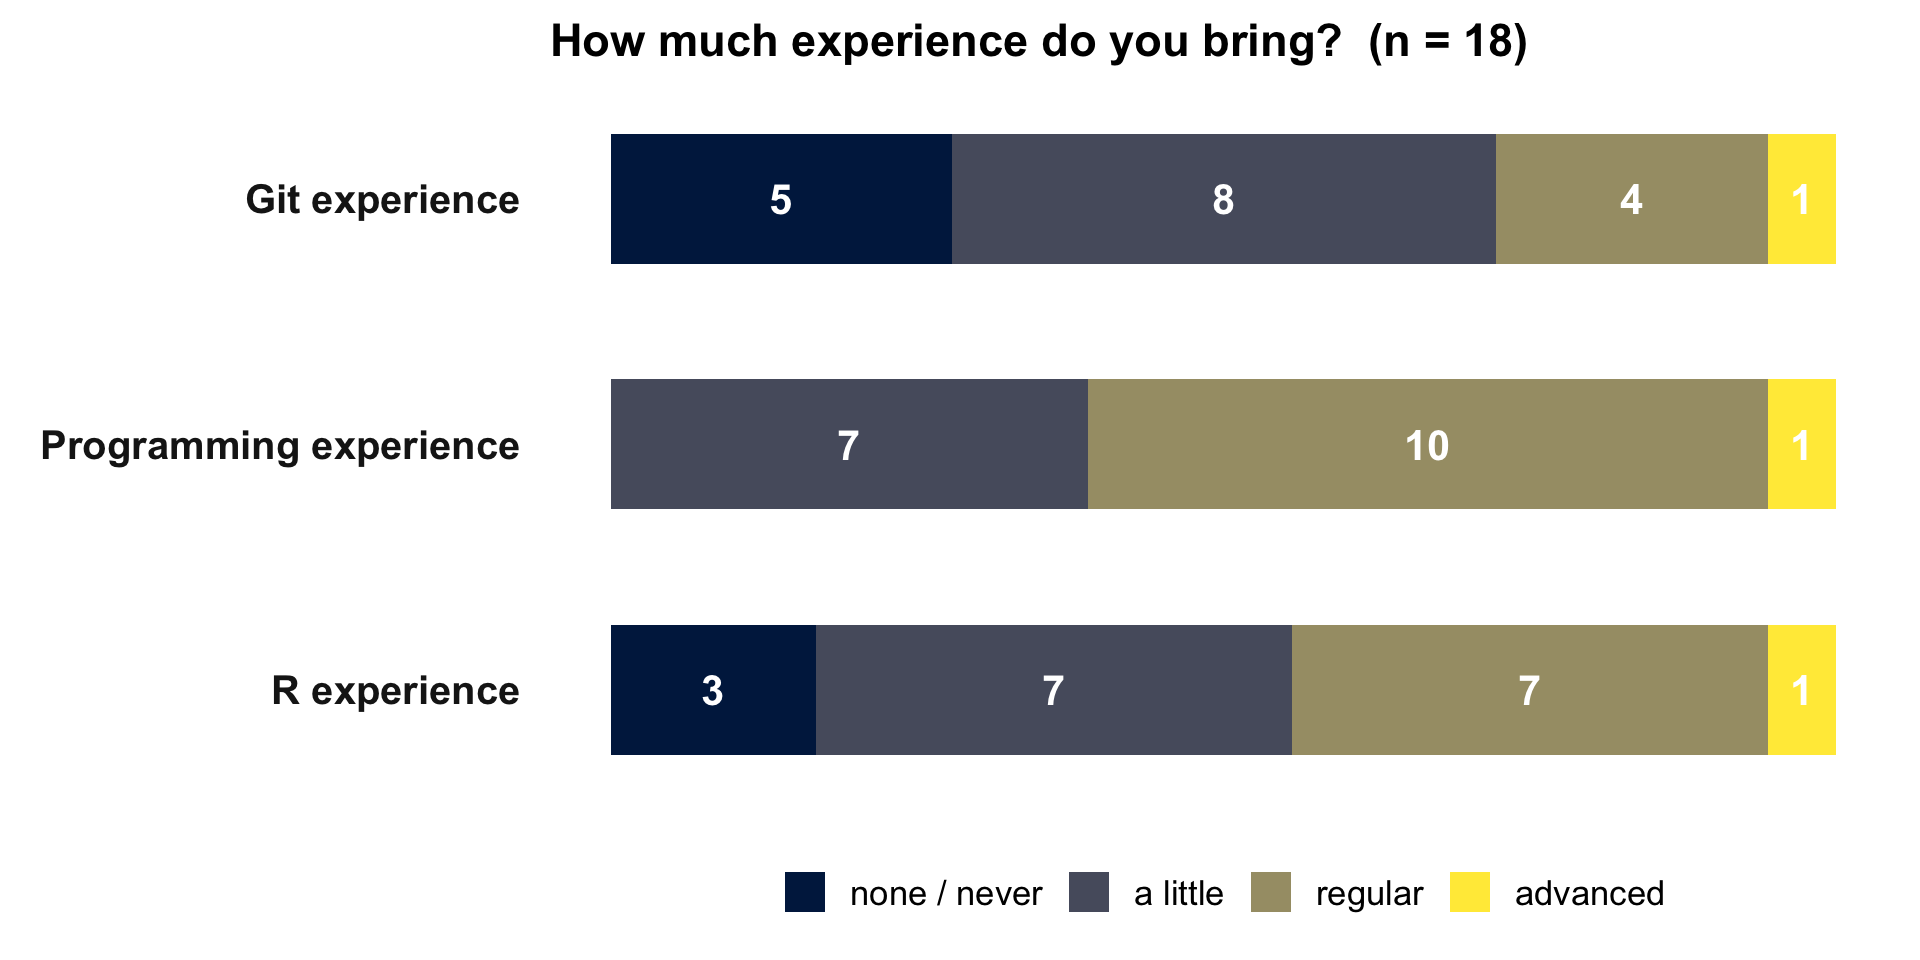
How you store your data today
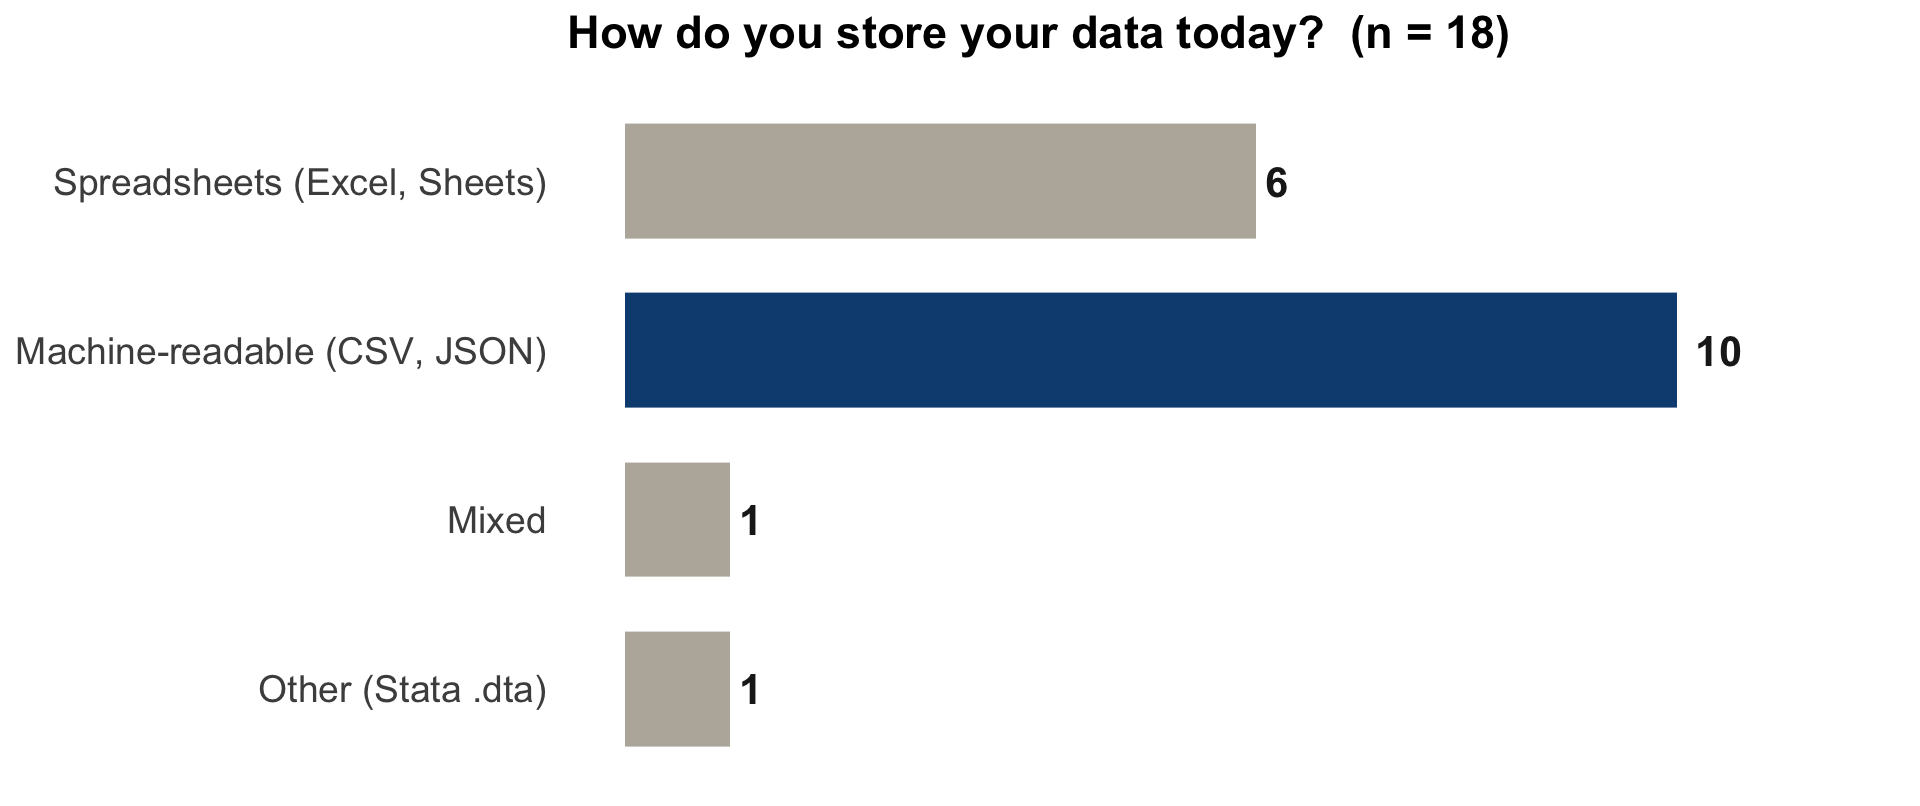
What you want to learn
From your pre-course survey (n = 18), three groups:
- Covered directly today (10): use Git without fear, the full commit cycle, branching, documenting a reproducible workflow, and collaborating and reviewing through pull requests.
- Partially covered (1): rebasing and staging in a systematic way. We build the foundation; the advanced moves are a natural next step.
- The follow-up workshop (7): Git together with AI coding agents. Today is the Git foundation that makes it possible.
Meet Arti
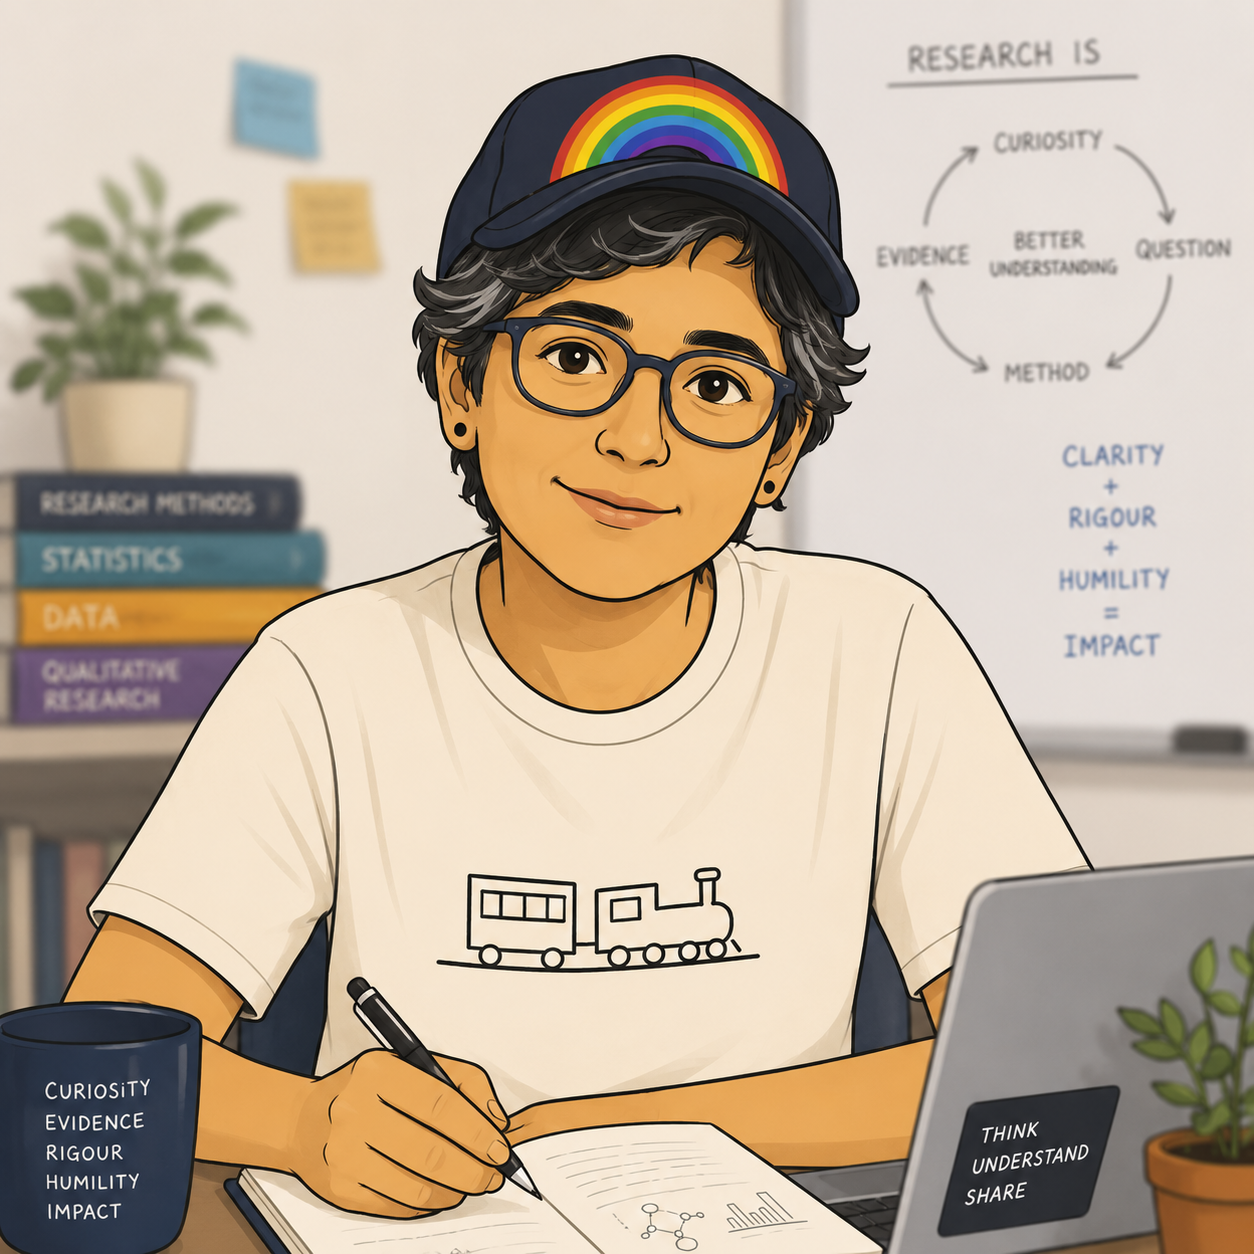
Three personas describe this room (Arti, Bianca, Cem). My focus learner is Arti.
- Background: post-doc, in a group of mixed Git fluency.
- Knows: some R; lives in Word, Docs, and email; versions files by hand. Tried Git once, an error stopped them cold.
- Wants: to collaborate without fear.
- Needs: a safe-to-fail room.
Course structure
- My turn: Lecture segments + live coding
- Your turn: Individual or 2-people team exercises (in break-out rooms on Zoom)
Course icons
Two icons tell you where a step happens:
- in the RStudio IDE, on your own machine
- on GitHub, in the browser
Watch for these on every “Your turn” slide.
Learning objectives
By the end of this workshop, you will be able to:
Commit cycle: create and clone a repository, and run the full pull, stage, commit, push cycle from the RStudio IDE, including reverting a commit.
Collaboration: create a branch and open a pull request, review a colleague’s pull request, and merge it after review.
Concept map: draw how Git and GitHub fit together.
Schedule
| Time | Module |
|---|---|
| 09:30 - 10:00 | Arrival |
| 10:00 - 10:30 | Part 1: Welcome, concept-map intro, baseline map |
| 10:30 - 10:50 | Part 2: Create & Clone |
| 10:50 - 11:00 | Break |
| 11:00 - 11:30 | Part 3: The commit cycle |
| 11:30 - 11:50 | Part 4: Team work |
| 11:50 - 12:45 | Lunch Break |
| 12:45 - 13:05 | Part 5: Work on a branch |
| 13:05 - 13:45 | Part 6: Pull Request, Review, Merge |
| 13:45 - 13:50 | Movement Break |
| 13:50 - 14:00 | Part 7: Merge conflict |
| 14:00 - 14:30 | Part 8: Concept map revisit and wrap-up |
Concept maps
Concept maps
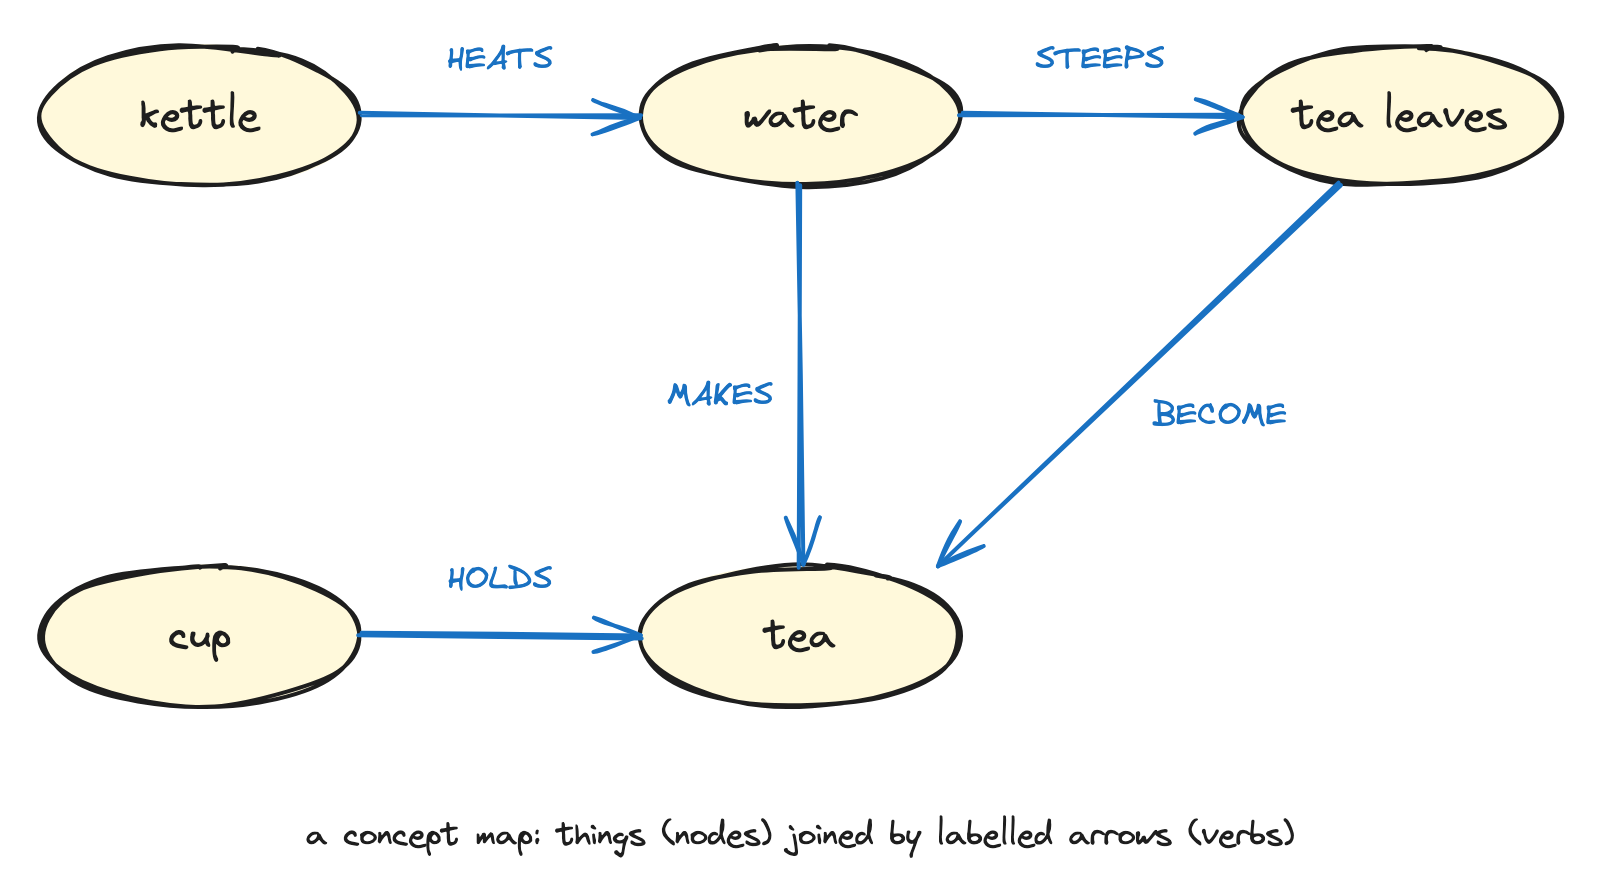
A concept map is things (nodes) joined by labelled arrows, where every label is a verb.
Your turn: your baseline map
How does a document you write reach your co-author and come back? Draw it as a concept map.
- Things as nodes, arrows with verb labels.
- There is no wrong map; this one is yours.
- Keep the map. You will need it again at the end of the day.
In the room: place the yellow sticky note on your laptop when your map is done.
On Zoom: write “done” in the chat.
Part 2: Create and clone {background-color=“#5c5751”}
Create and clone: Arti’s project
Arti (before)
- starts a new folder on her laptop
- adds data as
.xlsx - adds a
.docxreport - adds an R script
Arti (after)
- creates a repository on GitHub
- clones it and opens an RStudio project
- adds data as
.csv - adds a Quarto document and an R script
My turn
Sit back and watch.
Note down any questions as they come up. We pick them up right after.
Your turn
On github.com
- Create a repository called
website, public, with a README (so the clone is never empty).
In RStudio
Set two options once (Tools > Global Options): General > never save
.RDataon exit; Code > use the native pipe|>.Clone: File > New Project > Version Control > Git, paste the HTTPS URL, create the project inside your
gitrepos/gh-USERNAMEfolder.Find
.gitignoreandwebsite.Rprojin the Git tab with their yellow ? icons.
In the room: place the yellow sticky note on your laptop when you see the two yellow ? icons.
On Zoom: write “done” in the chat.
Everyone with the two yellow ? icons? Take your sticky note back down.
We move on together.
Local and remote
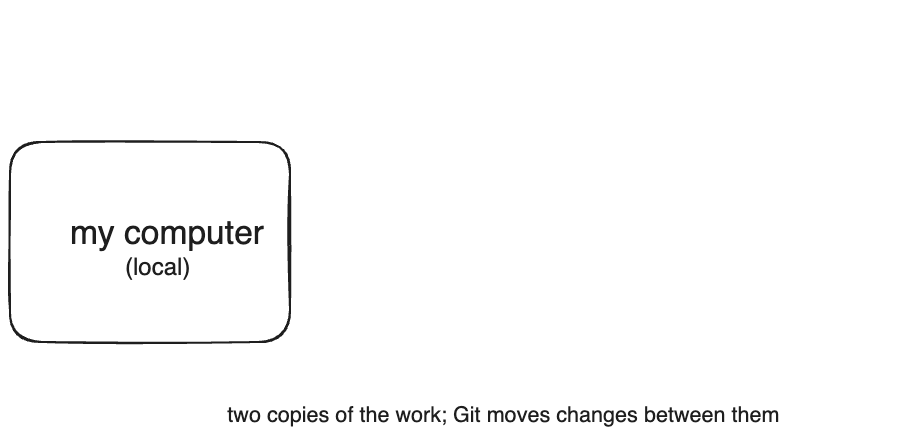
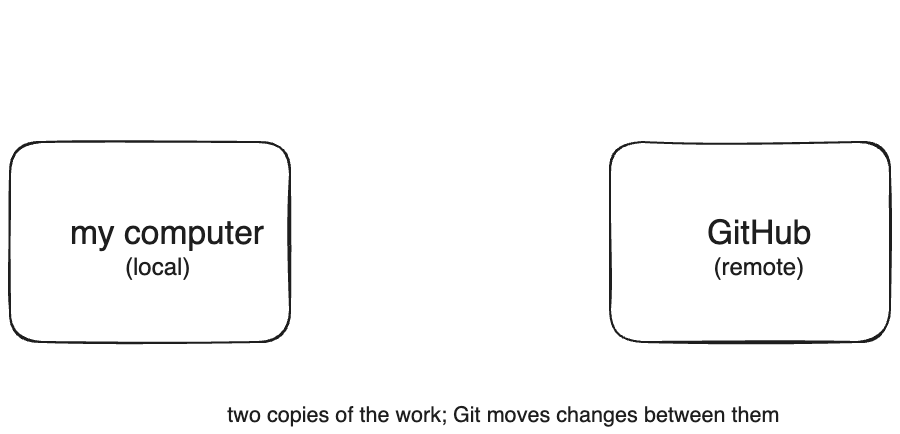
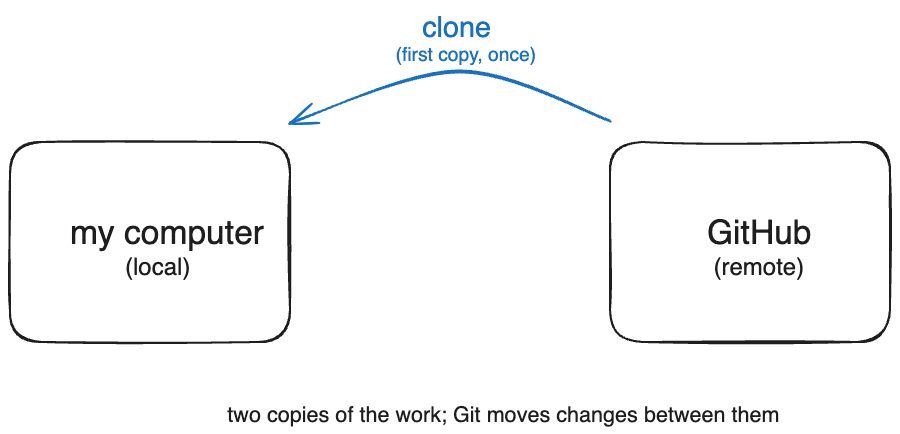
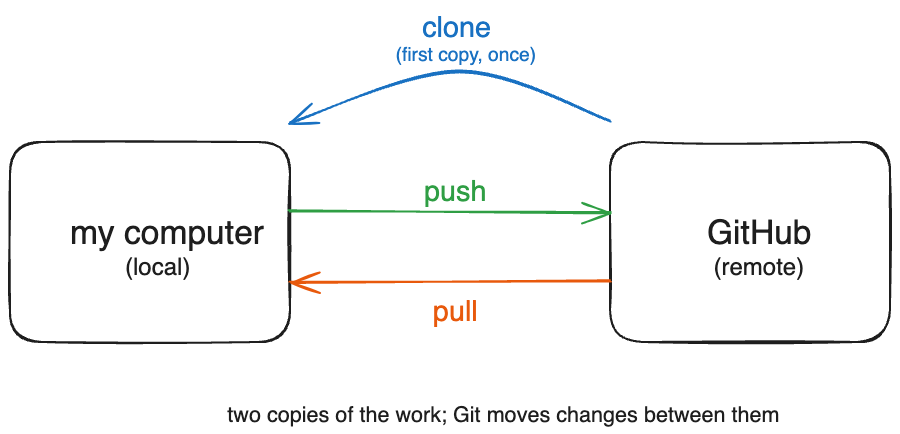
Anything from creating and cloning you’d like clarified before the break?
Take a break
Please get up and move!
Image generated with DALL-E 3 by OpenAI
Part 3: The commit cycle {background-color=“#5c5751”}
A button is a command
- RStudio is a GUI, a graphical user interface.
- When you click Pull in the Git tab, RStudio runs
git pullfor you. - Every button we use today is a Git command underneath. Clicking it is not a lesser path.
The commit cycle: Arti’s commit
Arti (before)
- opens a
.docx - edits the text, it autosaves
- automated version history
- sends an email to say what changed and why
Arti (after)
- opens a Quarto file
- edits the text, it autosaves
- after meaningful changes: pull, stage, commit, push
- the commit message says what changed and why
My turn
Sit back and watch.
Note down any questions as they come up. We pick them up right after.
Your turn
The cycle, always in this order: Pull, Stage, Commit, Push (PSCP).
In RStudio
- Edit your
README.md: describe your website in one sentence. Save, and spot the blue M in the Git tab. - Run the full cycle: Pull, Stage, Commit (a message that says what changed), Push.
On github.com
- Open your repository and find your commit message and your change.
In the room: place the yellow sticky note on your laptop when you can see your commit on GitHub.
On Zoom: write “done” in the chat.
Our turn
Now the same cycle, but starting on GitHub. In your website repository:
On github.com
Edit
README.mdand commit the change (the pencil icon, then “Commit changes”).Add a file inside a new folder (Add file > Create new file, type
data/notes.md).
In RStudio
- Pull to bring both commits down to your laptop.
Place the yellow sticky note on your laptop when the two new commits show up in RStudio.
The commit cycle
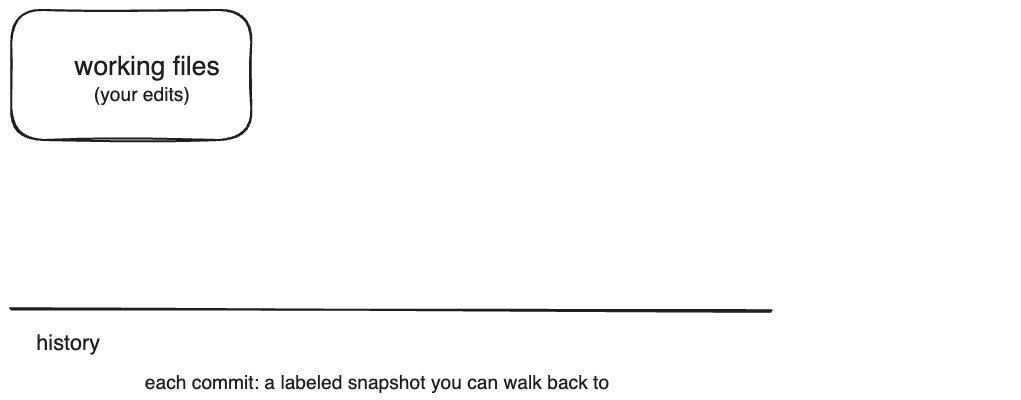
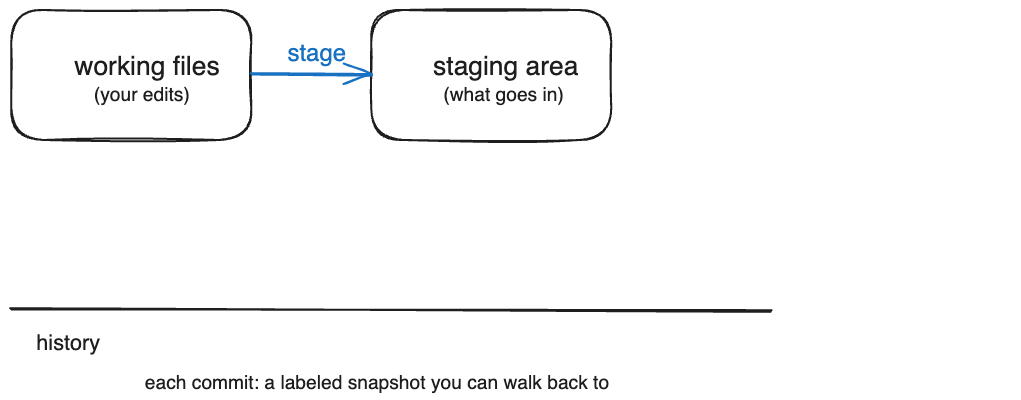
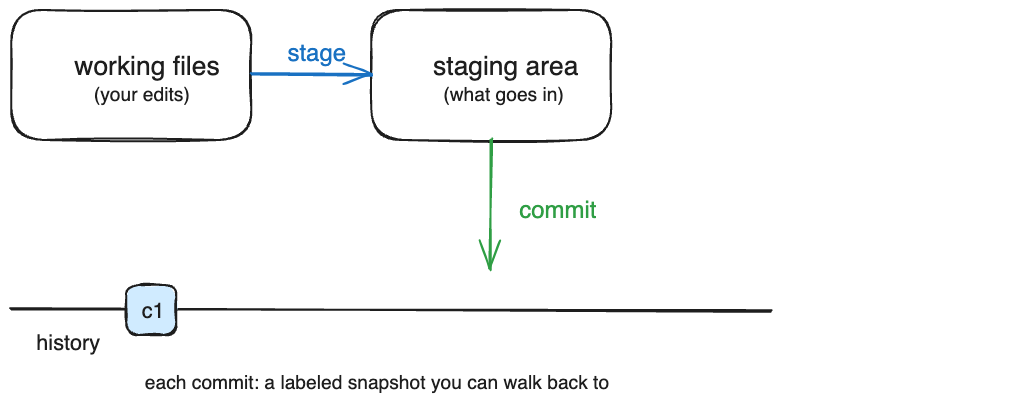
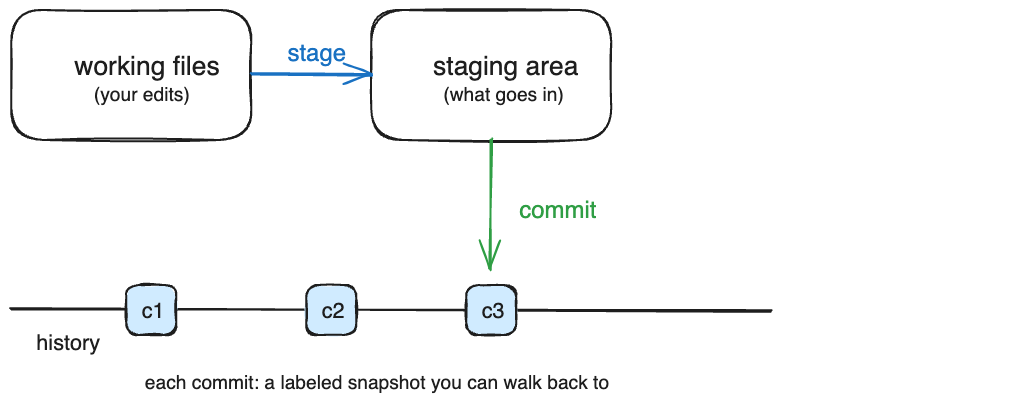
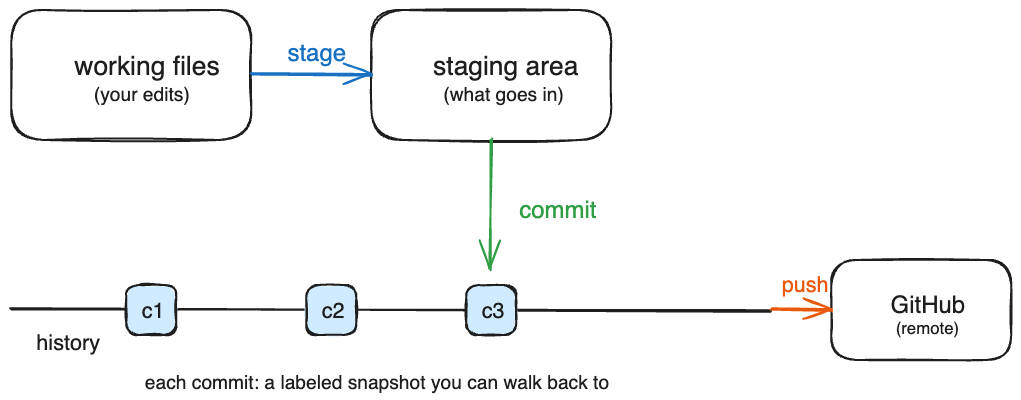
Anything from the commit cycle you’d like clarified before we move on?
Part 4: Team work {background-color=“#5c5751”}
Team work
Arti (before)
- opens SharePoint
- finds Cem’s docx file
- edits it in track changes
- autosaves
- emails Cem to say it is done
Arti (after)
- opens the project in RStudio
- finds Cem’s Quarto file
- edits
- runs the PSCP mantra
- comments / closes open issue to say it’s done
Find your partner
- You are in a pair with the partner you were told about before today.
- Write each other’s GitHub username on your sticky notes.
- Keep that sticky note. Your partner returns after lunch.
Your turn
On github.com
- Browse to
github.com/USERNAME, where USERNAME is your partner’s username.
In RStudio
Clone their
websiterepository (Code button, HTTPS URL, File > New Project > Version Control > Git) into a new foldergitrepos/gh-USERNAMEthat reflects your partner’s username.Edit the README: add “This repo contains a personal website for USERNAME.”
Run the mantra: Pull, Stage, Commit, Push.
What happens?
In the room: place the yellow sticky note on your laptop when something unexpected happens.
On Zoom: write “blocked” in the chat.
What just happened?
- Your push failed: you can read their repository, but you have no write access.
- Giving everyone write access (“collaborator”) exists, but it does not scale, and it means anyone can change anything at any time.
- So how do teams actually propose and review changes? That is exactly what we solve after lunch: branches and pull requests.
- But before that, one last exercise to tie the morning together.
Exercise: Match the Git command to the button
A one-page handout: draw a line from each Git command to the button that runs it in RStudio or on GitHub.
- 3 minutes on your own.
- 5 minutes comparing with your partner.
- The point: clicking a button runs the same command a terminal user types.
Lunch
The afternoon starts hands-on, and your partner is waiting for you.
Part 5: Work on a branch {background-color=“#5c5751”}
Work on a branch: Arti’s branch
Arti (before)
- one shared file
- everyone edits the same copy
- edits clash: two people change the same line and one overwrites the other
Arti (after)
- creates a branch for their work
- edits safely, away from
main - their changes wait until the team is ready to bring them in
My turn
Sit back and watch.
Note down any questions as they come up. We pick them up right after.
Your turn
Your team shares one manuscript repository, washinvestments-<team> (for example washinvestments-red).
On github.com
- Find and clone your team’s
washinvestments-<team>repository (org page, search your team name).
In RStudio (one person drives)
- Git pane: New Branch, name it
dev. - In
manuscript.qmd: put in your own author details in one of the two author slots. Render. - Run the mantra: Pull, Stage, Commit, Push with the message “update author details”.
In the room: place the yellow sticky note on your laptop when your push has finished.
On Zoom: write “done” in the chat.
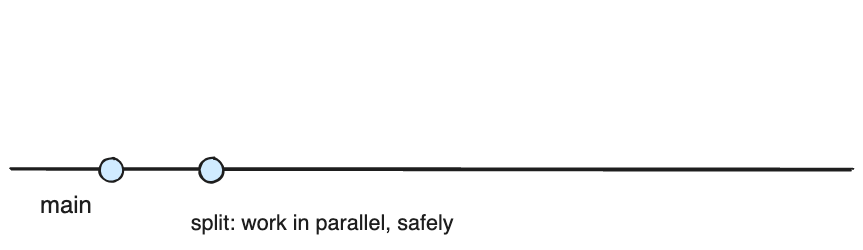
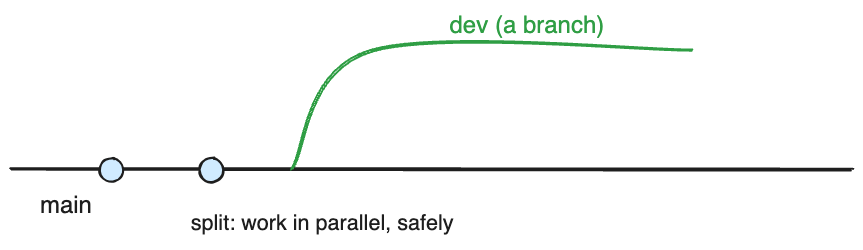
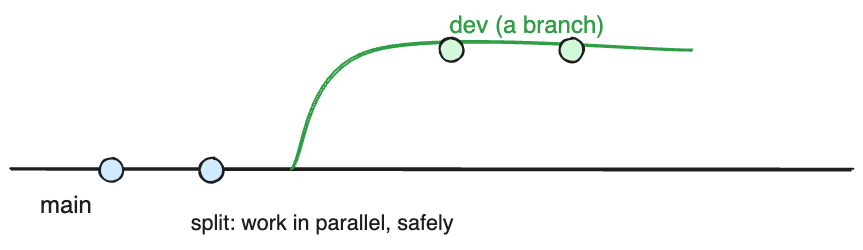
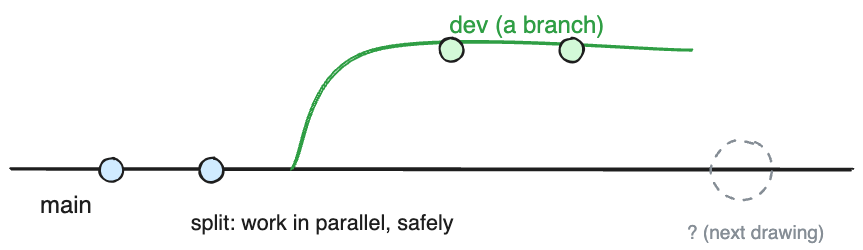
Branching
Part 6: Pull request, review, merge {background-color=“#5c5751”}
Review
Arti (before)
- emails file / SharePoint
- uses comment function
- poor record of who changed what, when
Arti (after)
- opens a pull request
- her partner leaves line comments
- the change is merged after review, with a full record
My turn
Sit back and watch.
Note down any questions as they come up. We pick them up right after.
Your turn
You each take a role: Author owns the pull request; Reviewer reviews it.
Author (goes first)
On github.com
- Open a pull request from your
devbranch. Title it so your reviewer knows what changed. - Request a review from your partner.
- Read the review. Then either make the proposed changes and push again, or merge as is. Confirm the merge.
In RStudio
- Switch to
main, Pull, and switch back todev.
Reviewer (goes second)
On github.com
- Open your partner’s pull request.
- Start a review: leave at least one line comment.
- Add an overall comment, then submit the review.
In the room: place the yellow sticky note on your laptop after the switch back to dev. Then swap roles.
On Zoom: write “done” in the chat.
The pull request
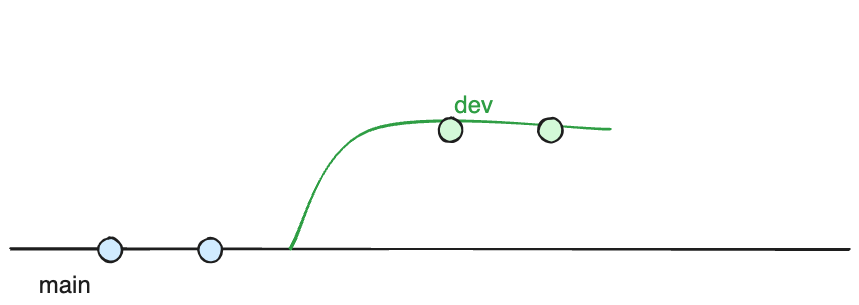
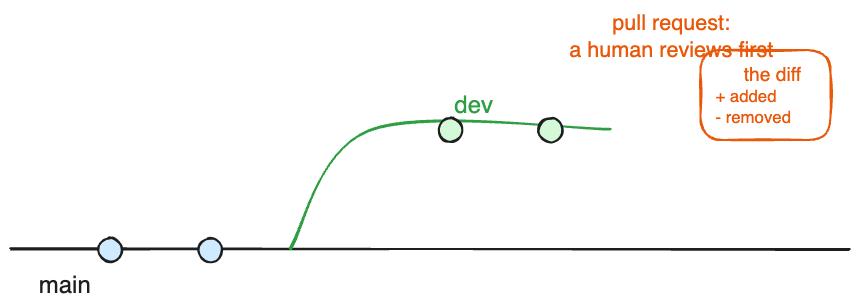
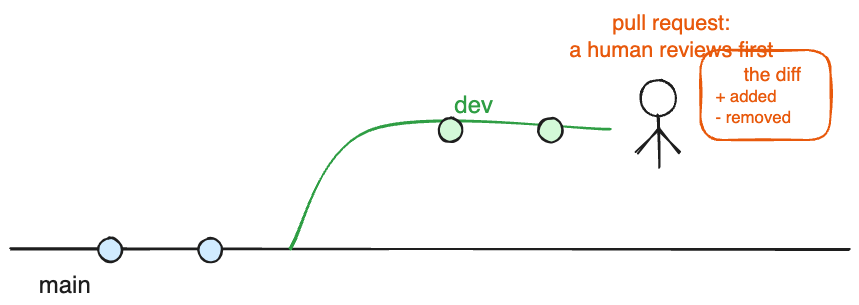
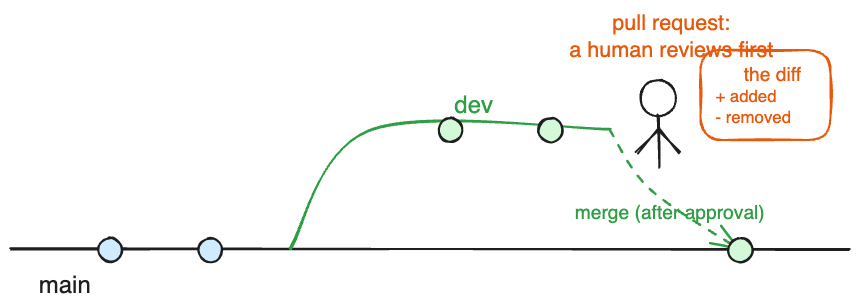
Part 7: Merge conflict {background-color=“#5c5751”}
When two edits meet: Arti’s conflict
Arti (before)
- two people edit the same line
- last save wins
- the other edit is silently lost
Arti (after)
- Git spots the clash and stops
- it marks both versions in the file
- Arti chooses, nothing is lost
My turn
Sit back and watch.
A conflict is coming. Watch how Git asks me to choose.
Resolving a conflict
When Git stops, it writes both versions into the file:
<<<<<<< HEAD
Investments in WASH: a five-year review
=======
WASH investments: evidence from five years
>>>>>>> main
<<<<<<< HEAD: your version=======: the divider>>>>>>> main: the incoming version
Delete the markers, keep the text you want, then Stage, Commit, Push.
Part 8: Concept map revisit and wrap-up {background-color=“#5c5751”}
Your turn: your map, revisited
Draw a concept map of Git and GitHub as you understand them now.
- 5 minutes: Use the words from today: repository, clone, commit, push, pull, branch, pull request, merge, review.
- 5 minutes: Pin it on the wall next to your morning map, so both maps sit side by side.
- 5 minutes: Walk to your team member’s two maps and talk through what changed between morning and now.
With your consent, I would like to photograph both maps (anonymously) to improve this workshop.
Wrap-up
What you learned today
Matched to the three objectives from this morning:
- Commit cycle: you created and cloned a repository and ran the full pull, stage, commit, push cycle.
- Collaboration: you opened a pull request, reviewed a partner’s, and merged after review.
- Concept map: you drew how Git and GitHub fit together, twice, and saw what changed.
Why this matters
- Issues, commit messages, and pull-request reviews are visible to other people. They show how you work and communicate.
- That signal only grows as more content is AI-generated: a clear issue with a good task description guides your collaborators, and guides any AI agent you run on the repository.
- The issue tracker is a TODO list attached to the work. Tasks live on the repository, and once closed they stay there, next to the commits and messages that resolved them.
What you also learned today
- RStudio IDE, now with muscle memory
- Quarto: one document; reproducibility; many use cases
- Reversibility as a habit: commit early, revert when needed
What comes next
- GitHub Project and Task Management is the next workshop (tentatively 26 August, 09:30–14:30). It builds on exactly what you did today: branches, pull requests, review.
- Want to keep practising? Work with me on a small, free personal website to rehearse branching, pull requests, and reviews on something that is yours.
- Interested in either? Email me and you will hear from me when dates are set.
- Start your first own project with Git and GitHub this week (already have a project? Read here).
- Keep learning by doing: open pull requests to yourself, review your own diffs.
Feedback, and thanks!
- Please fill in the post-course survey (link shared by email, 5 (max 10 minutes), anonymous).
- Share your open questions: Google Doc or Issue tracker; I will answer all of them next week
Thanks!
Slides created via revealjs and Quarto: https://quarto.org/docs/presentations/revealjs/
Access slides as PDF on GitHub
All material is licensed under Creative Commons Attribution 4.0 International.
